Why star trails come out dotted, and the arithmetic that fixes it
Dotted or beaded star trails are exposure gaps: the interval between frames is longer than the exposure, so the shutter is closed while the sky keeps turning. They are not a stacking bug or a focus problem.
The cause, in one line
If your interval is 32 seconds and your exposure is 30 seconds, the camera recorded 30 seconds of movement and missed 2. Repeat that across a complete, regularly timed sequence and each trail is a row of 30-second dashes separated by 2-second holes. In that regular case the holes are proportional to interval minus exposure; dropped frames or a varying timer create larger, irregular gaps.
The usual sources of that difference are the write time to the card, long-exposure noise reduction (which takes a dark frame after every shot and doubles your dead time), and an intervalometer set to a round number that happens to be a second or two longer than the shutter.
How long the gap is, in pixels
This is worth doing once by hand, because after that you will never accept a slider for it again.
-
Gap in seconds = interval − exposure. Both are in your EXIF: the interval is the difference
between two consecutive
DateTimeOriginalvalues, the exposure isExposureTime. - Gap in arcseconds of sky = gap × 15.041. The sky turns 360° in a sidereal day, which is 15.041 arcseconds every second, near the celestial equator.
-
Image scale = 206265 × (sensor width ÷ image width) ÷ focal length, in arcseconds per pixel.
Focal length is in the EXIF; sensor width comes from
FocalPlaneXResolutionor from the 35 mm equivalent focal length. - Gap in pixels = arcseconds ÷ arcseconds-per-pixel.
A worked example. A 24-megapixel full-frame camera at 24 mm: 206265 × (36 ÷ 6000) ÷ 24 = 51.6 arcseconds per pixel. With a 30-second exposure on a 32-second interval, the gap is 2 seconds = 30.1 arcseconds of sky = 0.58 pixels. That is invisible, and a set like that needs no gap filling at all.
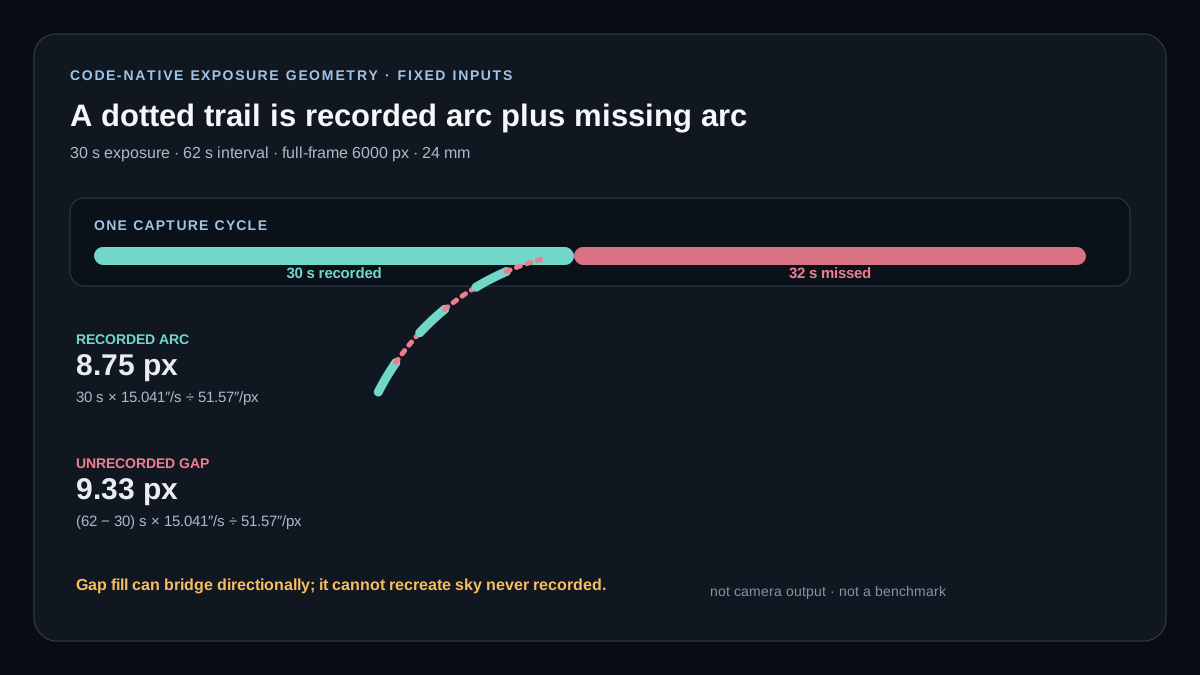
Now the same camera with long-exposure noise reduction on, so the interval is 62 seconds: the gap is 32 seconds = 481 arcseconds = 9.3 pixels. That is a clearly beaded trail, and the fix at capture time is one menu setting.
The fix while you are still outside
- Turn off long-exposure noise reduction
- It doubles your dead time by taking a dark frame after every exposure. For trails you do not need it — stuck pixels are better removed by their persistence across the whole sequence, which needs no dark frames at all and is what this tool does.
- Set the interval as close to the exposure as the camera will allow
- Use the shortest interval the camera and card can sustain, then verify it from consecutive EXIF timestamps. A card that cannot keep up may drop a frame, which makes a much larger gap.
- Shoot smaller RAW or lossless 16-bit if the card is the bottleneck
- Write time scales with file size. Our earlier 8-bit detection comparison used a broken noise estimate and is being re-measured, so it is not a basis for throwing precision away. JPEG chroma subsampling also changes the colour of tiny stars in the controlled browser fixture. If faint detection or trail colour matters, use smaller RAW or lossless 16-bit TIFF/PNG while the 8-bit result remains unsettled.
- Use the camera's own interval timer rather than a cable release with a fixed cycle
- An external timer that fires every 32.0 seconds against a 30-second shutter will drift in and out of sync with the write, producing an irregular gap that is harder to fill than a constant one.
The fix afterwards, and its limits
Gap filling extends each recorded dash along the direction the trail is travelling until it meets the next one. It works, and it is what makes a beaded sequence look continuous. What it cannot do is invent the sky that was not recorded: if an aircraft crossed during a gap, or a star brightened during it, that is simply not in your data.
Two details this tool handles that an unlabelled slider cannot. The initial length is derived from the arithmetic above and shown before the run. The direction is estimated locally across the frame, because star trails are concentric arcs around the celestial pole — a trail near the pole runs at a completely different angle from one near the horizon, and extending everything in one direction, or in all directions equally, either misses or thickens.
Extending in all directions equally is what a plain circular blur-and-brighten does, and it is why so many gap-filled trails come out looking thick and soft. A trail is one or two pixels wide; the fill should make it longer, not fatter.
What that looks like on a real night
Below is one 15-second frame, then the equalised-lighten stack of all 380 of them — 95 minutes of sky on a Sony A7C, built by this tool with nothing removed. The interval was 18 seconds against a 15-second shutter, so the gap is 3 seconds: short enough that the arcs come out very nearly continuous rather than beaded. Drag the slider.
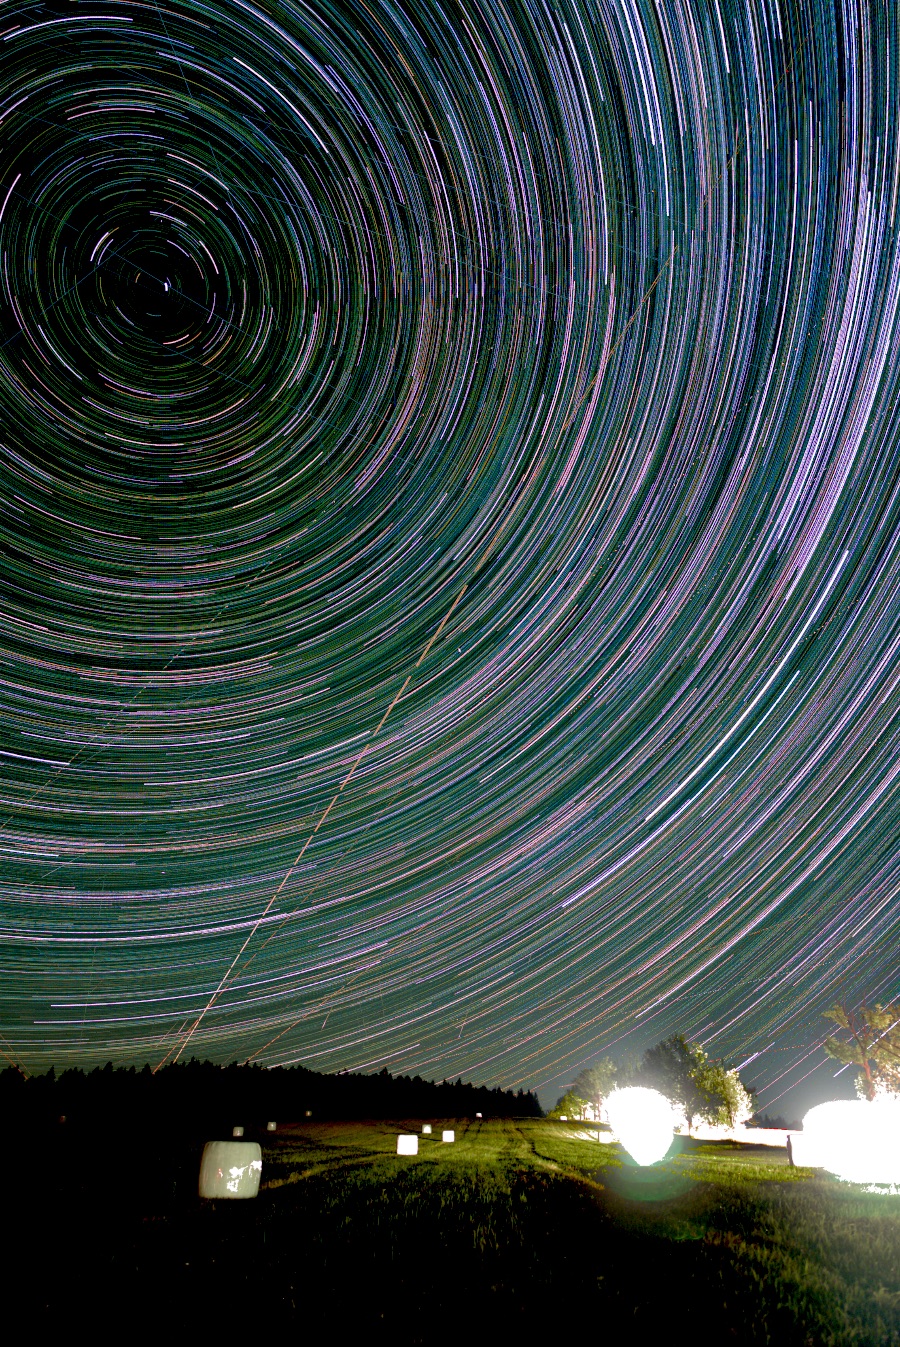
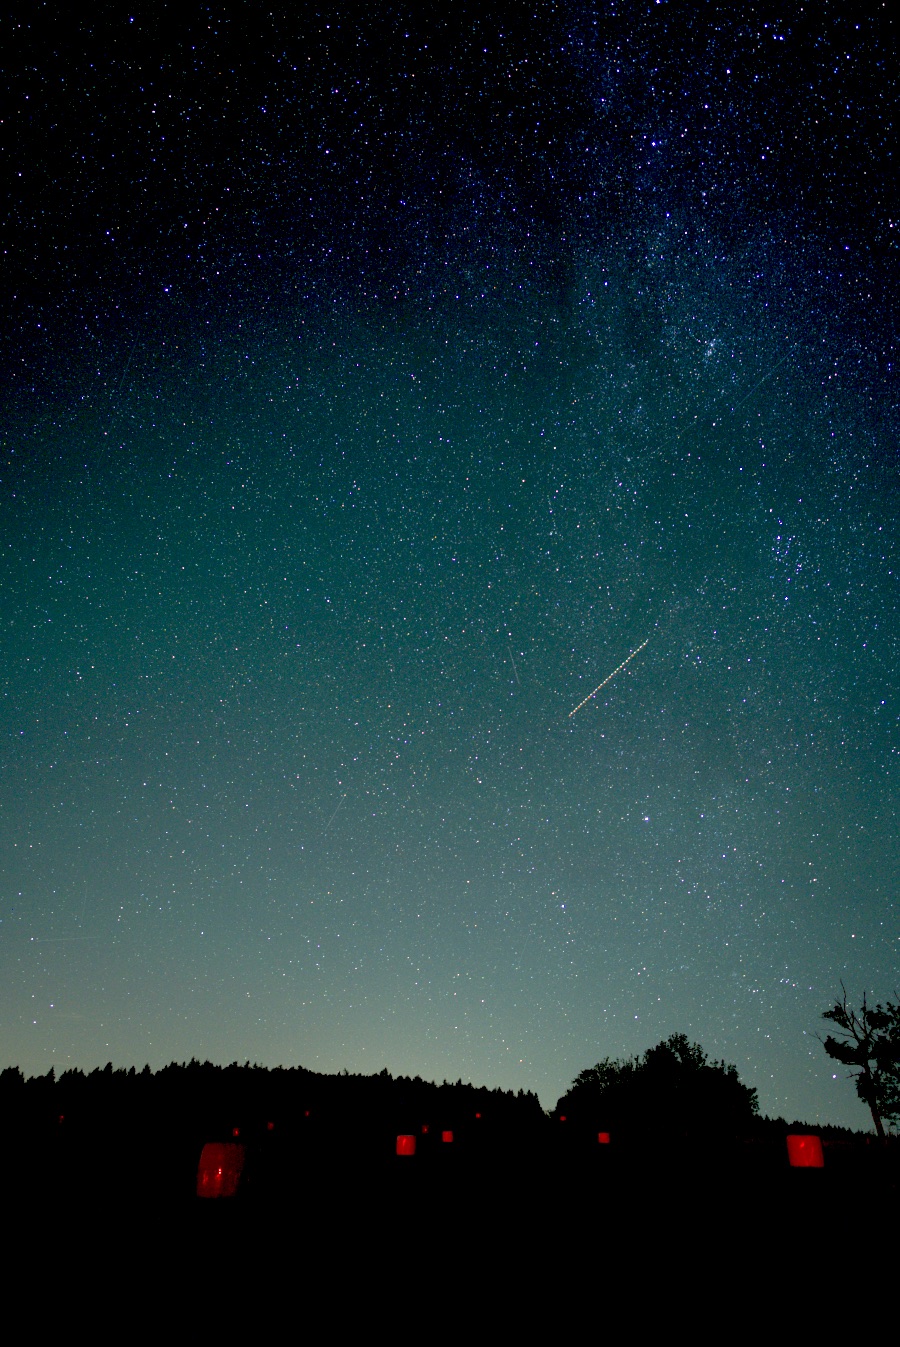
Watch two things across the wipe: every star point on the single frame becomes an arc, and the one short dash near the middle of the single frame becomes the long straight line crossing the arcs — an aircraft or satellite, which is what the trail search is built to find and take out.
Plan the interval before the shoot, or open your sequence in the tool — it prints the interval, the exposure, the gap in seconds and the radius in pixels, with the arithmetic beside it, before it stacks anything. Or read why a plain lighten stack loses faint trails and what runs on a Mac.